
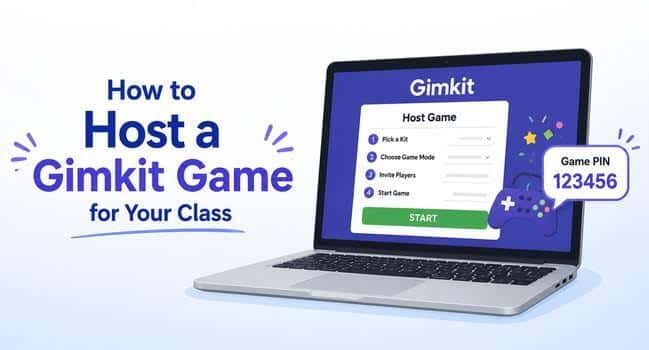
Gimkit Host Guide: How to Host a Gimkit Game for Your Class
Hosting a Gimkit game can make classroom review more interactive, but teachers need more than a game code to run a successful session. They need to choose an appropriate game mode, set the right options, help students join, manage the activity, and use the results to guide instruction.
Whether you are using Gimkit for a mathematics review, a science lesson, vocabulary practice, or test preparation, the hosting process follows a straightforward sequence.
In this guide, you will learn how to host a live Gimkit game, share the game code or QR code, manage students during gameplay, solve common problems, and use the results to plan your next lesson.
What Does It Mean to Host a Gimkit Game?
A Gimkit host is the teacher or account holder who starts and manages a live game.
The host selects a Kit, chooses an available game mode, adjusts the settings, opens the lobby, and invites students to participate. During the game, the host can use the available controls to manage the session.
A Kit is the set of questions students answer during the activity. You can prepare one before class or choose an existing Kit from your account.
If you have not created your questions yet, follow our separate guide: How to Make a Gimkit.
This guide focuses on what happens after your Kit is ready.
How to Host a Gimkit Game: Step-by-Step Instructions
Step 1: Sign In to Your Gimkit Account
Open the official Gimkit website and sign in to your educator account.
Find the Kit you want to use for your lesson. Before proceeding, check that its questions match your learning objective and are suitable for your students.
For example, if your Grade 6 students are learning about the water cycle, choose a Kit that covers evaporation, condensation, precipitation, and collection rather than a general science quiz.
Teacher tip: Review a few questions before class. Incorrect answers, unclear wording, or questions that cover unrelated topics can make the activity less useful.
Step 2: Select Your Kit and Click Play Live
Find your chosen Kit in the dashboard and click Play Live. You can also open a Kit and select Play Live from its available controls.
Gimkit will open the Mode Picker, where you can browse the game modes available for your account.
You do not need to create a new Kit every time you host a game. You can reuse an existing Kit when it fits your current lesson.
Step 3: Choose a Game Mode
Different Gimkit game modes create different experiences. Some emphasize competition, some encourage teamwork, and others use different forms of strategy or exploration.
To choose a suitable mode, begin with your instructional goal.
| Classroom purpose | What to consider |
|---|---|
| Quick revision before a test | A straightforward mode that lets students practise questions efficiently |
| Collaborative review | A mode that supports teamwork or shared goals |
| Vocabulary practice | A mode that gives students repeated opportunities to answer questions |
| End-of-unit revision | A mode with a suitable goal and enough time to cover the important content |
| A short lesson warm-up | A mode that can fit comfortably into the available time |
These are selection principles, not guarantees that a particular mode will be available on every account.
Gimkit’s official guide to selecting a game mode explains how to browse modes and read their descriptions.
Teacher tip: Do not choose a mode only because it looks exciting. Choose one that supports the type of practice your students need.
Step 4: Configure the Game Options
After selecting a mode, click Continue to reach the game options screen.
The available options depend on the mode. Review the settings displayed before you open the lobby.
Pay particular attention to the following.
Game goal: Choose a suitable ending condition, such as a time limit or another goal offered by the selected mode.
Join in Late: Decide whether students should be allowed to enter after the game starts. Gimkit’s live games allow teachers to control this setting, and late joining is enabled by default according to its official help documentation.
Nickname Generator: Consider enabling this feature if you want Gimkit to assign students safe, generated names rather than allowing them to enter their own names.
Classes: If you use Gimkit Classes, check whether you want to connect the relevant class.
Mode-specific settings: Review any additional options that affect how the game works.
For example, if you have only 15 minutes for revision, choose a game goal that leaves time to discuss difficult questions afterward.
For further details, consult Gimkit’s official hosting help.
Step 5: Open the Game Lobby
Once you have configured the options, click Continue again.
Gimkit opens the lobby, where students can join before the game begins.
The lobby is also a useful place to check whether the class is ready. Depending on the selected mode, the screen may display player names, characters, and other information.
Before starting, check for:
- Students who have not joined.
- Unexpected participants.
- Duplicate or inappropriate names.
- Students who need help accessing the game.
If your class uses individual devices, project the lobby on the classroom screen so students can follow the joining instructions.
Step 6: Share the Game Code, Join Link, or QR Code
Students can join a live Gimkit game using the game code, a direct join link, or a QR code displayed by the host.
Option 1: Share the game code
Ask students to open Gimkit Join, enter the code displayed on your host screen, and follow the joining instructions.
Option 2: Share the direct join link
Gimkit provides a way to copy a link to the live game. Share it through your classroom platform or another appropriate channel.
Option 3: Display the QR code
According to Gimkit’s official instructions, hovering over the game code on the host screen displays the QR code. Students can scan it to join.
See the official Gimkit QR code instructions.
Classroom example: Instead of asking 30 students to type a code individually, display the QR code on the board. Give students a short period to join, then check the lobby before starting.
Step 7: Check the Lobby and Start the Game
Once students have had time to join, confirm that the participants are ready.
If you notice a student using an inappropriate name or someone who should not be in the game, use the available participant controls where supported.
When the class is ready, click Start Game. The button’s position depends on the selected mode, so follow the controls shown on your screen.
Give students a brief reminder of the activity’s purpose before beginning.
For example:
“Today we are reviewing equivalent fractions. Focus on identifying which fractions represent the same value. We will discuss the questions that cause the most difficulty after the game.”
This makes the learning purpose clear before the competition begins.
How to Manage a Gimkit Game During Class
Starting the game is only one part of hosting. Teachers also need to manage the session without interrupting learning unnecessarily.
Monitor the Available Host Controls
Gimkit’s controls vary by game mode. In supported 2D games, the host interface can include the game code, leaderboard, player list, sound controls, spectating options, timer, and End Game control.
Familiarize yourself with the controls before using a new mode.
The official guide to host controls for 2D games explains the controls available in those games.
Decide How to Handle Late Arrivals
If a student arrives late or has a technical problem, check whether Join in Late is enabled.
If it is enabled, the student may be able to join the running game. If it is disabled, you may need another plan for that student.
Consider your classroom circumstances before starting. For example, when students frequently share devices or have unreliable internet access, allowing late joining may reduce unnecessary interruptions.
Manage Names and Participants
The Nickname Generator can help teachers avoid inappropriate custom names. It may be particularly useful when projecting the game on a classroom display.
If you use Classes or need to identify individual students, review the available account and class options before starting.
Explain your expectations clearly. Students should know that the activity is part of learning and that classroom behavior still matters during a game.
Use the Timer and End Game Controls Thoughtfully
Some supported 2D games allow the host to add time by clicking the timer. Gimkit also provides an End Game control.
The exact controls depend on the mode.
Do not extend a game automatically because students want more time. First consider whether continuing will help students practise the intended content or whether the class would benefit more from reviewing difficult questions.
How to Use Gimkit for Formative Assessment
Gimkit can support formative assessment when teachers use the activity to identify what students understand and what they need to practise further.
A leaderboard alone does not show the full picture of learning. Students may perform differently because of their familiarity with the game, reading speed, device access, or understanding of the questions.
After the activity, use the available report and question information to identify patterns.
Example: A Grade 6 Science Lesson
Suppose you have taught the water cycle and prepared a Kit containing questions about evaporation, condensation, precipitation, and collection.
After hosting the game, you notice that several students struggled with questions about condensation.
Instead of repeating the entire lesson, begin the next class with a short demonstration explaining how water vapor cools and forms droplets.
Then ask students to explain the difference between evaporation and condensation in their own words.
In this example, Gimkit is not replacing instruction. It is helping the teacher decide what to teach next.
Example: Mathematics Revision
Imagine that your class is preparing for a fractions assessment.
You host a Gimkit game with questions about equivalent fractions, comparing fractions, and adding fractions.
The available results suggest that students answer equivalent-fraction questions confidently but struggle with addition.
Use that information to prepare a short follow-up lesson on finding common denominators.
This approach makes the review activity part of a larger teaching cycle: assess, identify a need, provide instruction, and check understanding again.
How to Access and Review Gimkit Game Reports
Gimkit provides reports for supported games and Kits that you own. The available reporting options may depend on the activity and account features.
After hosting, open the Reports section of your dashboard or access the report through the available post-game controls.
Gimkit’s reporting documentation describes views that can include student information, an overall game summary, and question-level information.
Consult the official Gimkit hosting and help resources for current instructions.
When reviewing a report, ask these questions:
- Which questions caused the most difficulty?
- Are several students struggling with the same concept?
- Does the class need more guided practice?
- Which students may benefit from additional support?
- What should I teach or review next?
Avoid judging a student’s understanding from a single game or leaderboard position. Use the results alongside classwork, discussion, written responses, and other assessment evidence.
A Practical 45-Minute Lesson Using Gimkit
You do not need to dedicate an entire lesson to a live game. A short, planned session can leave enough time for explanation and follow-up practice.
| Time | Classroom activity |
|---|---|
| 5 minutes | Introduce the learning objective and activate prior knowledge |
| 5 minutes | Explain the game instructions and help students join |
| 15 minutes | Host the live Gimkit game |
| 5 minutes | Discuss difficult or frequently missed questions |
| 10 minutes | Provide targeted teaching or guided practice |
| 5 minutes | Use an exit ticket to check understanding |
Adjust these timings to suit your class, subject, and students’ needs.
The important point is to reserve time for learning after the game. Without a follow-up, teachers may miss the opportunity to address misconceptions revealed during the activity.
Common Gimkit Hosting Problems and Solutions
Students Cannot Join the Game
Check that students are using the correct game code or direct join link. Ask them to open the official Gimkit Join page and follow the displayed instructions.
Also check whether the game is still active, whether late joining is allowed, and whether the student’s device has a working internet connection.
A Student Joins With the Wrong Name
Review the available participant controls and consider using the Nickname Generator for future sessions if appropriate.
If student identification is important, check the available Classes options before the next game.
Students Are Distracted by Competition
Restate the learning goal before starting. Choose a suitable mode and explain that the activity is intended to help students practise, not simply identify the highest scorer.
After the game, discuss the questions and concepts that need more attention.
The Game Takes Too Much Class Time
Set a clear game goal before opening the lobby. Include joining time, gameplay, and follow-up discussion in your lesson plan.
If the activity regularly runs too long, shorten the session or use a smaller, more focused Kit.
Students Have Different Levels of Understanding
Use questions that match the learning objective and provide a suitable level of challenge. Where appropriate, follow the game with targeted support, additional practice, or extension questions.
Avoid assuming that every student needs the same follow-up instruction.
Gimkit Hosting Checklist for Teachers
Use this checklist before your next live session.
Before class
- Select a Kit that matches the lesson objective.
- Review the questions for accuracy and relevance.
- Choose an appropriate available game mode.
- Set a suitable game goal and review other options.
- Decide whether students can join late.
- Check the Nickname Generator and Classes settings if needed.
- Prepare the join code, link, or QR code display.
During class
- Explain the learning goal and game instructions.
- Give students time to join.
- Check the lobby before starting.
- Monitor participation and use the available host controls.
- Keep the activity within the planned lesson time.
After class
- Review the available game report.
- Identify difficult questions and possible misconceptions.
- Plan follow-up teaching or practice.
- Use another assessment method to check understanding.
Frequently Asked Questions
How do you host a Gimkit game as a teacher?
Sign in to Gimkit, select a Kit, click Play Live, choose an available game mode, configure the game options, and continue to the lobby. Share the game code, join link, or QR code with students. When the class is ready, click Start Game.
How do students join a live Gimkit game?
Students can visit Gimkit Join and enter the code shown on the teacher’s screen. They can also use a shared direct join link or scan the displayed QR code.
Can students join Gimkit without an account?
Gimkit’s official hosting instructions explain that students can join live games using the game code without Classes. If you use Classes or other account-dependent features, check the relevant requirements in Gimkit’s current documentation.
Can students join a Gimkit game late?
Yes, when the Join in Late option is enabled for the game. Check this setting before hosting because it affects whether students can enter after the game begins.
Can I host a Gimkit game without creating a new Kit?
Yes. You can host an existing Kit from your dashboard, provided it is available to your account.
How do I display a Gimkit QR code?
While hosting a live game, hover over the game code on the host screen. The QR code appears so students can scan it to join.
Can I end a Gimkit game early?
Gimkit provides an End Game control. Its location and the other available controls depend on the selected game mode. Use the controls shown in your host interface.
How can teachers use Gimkit results to improve learning?
Review the available report and question information to identify concepts that students found difficult. Use those patterns to plan targeted explanations, guided practice, or another assessment.
Final Thoughts
Hosting a Gimkit game is straightforward, but effective classroom use requires thoughtful preparation and follow-up.
Choose a Kit that matches your learning objective, review the available settings, help students join, and manage the activity within your lesson time. Most importantly, use the available results to decide what students need to practise or learn next.
A successful Gimkit session is not measured only by how excited students are or who finishes first. Its value comes from what students practise and what the teacher learns about their understanding.
Related guide: How to Make a Gimkit: A Practical Guide for Teachers
Official Gimkit resources